Work Your Opportunities
Learning Objectives
- Describe how to use opportunities.
- Create an opportunity.
- Add contact roles to an opportunity.
Opportunities as Deals
Opportunities are deals in progress. In Salesforce, you can create opportunities for existing accounts or by converting a qualified lead. Let’s explore how you can use opportunities to track your deals, better understand who you’re selling to, and focus your team’s efforts.
Opportunity Stages
If you’ve worked in sales, you know that deals usually progress from tentative to firm before they’re finalized. As a deal progresses, you grow more confident of making the sale. In Salesforce, an opportunity moves through a series of stages linked to the types of tasks being performed, and the likelihood of completing the sale.
The stages you usually go through can look like this.
- Prospecting
- Proposal/Price Quote
- Negotiation/Review
- Closed/Won
- Closed/Lost
You had a meeting with Leung and Alan from Get Cloudy Consulting. They’re interested in buying sneakers from a couple of different product lines. You still have a lot of work to do to close this deal, starting with putting together a package that they want to buy.
Your new opportunity for Leung and Alan is in the Prospecting stage. As you work the deal through different stages, the likelihood that Leung and Alan will buy from you increases. After all, if they were no longer interested in your product, they’d probably let you know or stop asking for information. You can estimate the likelihood of a sale based on the deal’s stage. Each stage is associated with a probability of winning the deal. Probabilities are used in creating forecasts. (To learn more about forecasting, see the Resources below.)
Not every company’s process is the same, so the stages your company uses for opportunities can differ from what you see in your Trailhead playground. Some companies set up separate sales processes for each type of sale that reps make. For example, Cloud Kicks can have one sales process to handle standard retail orders for large quantities, and another for small, custom orders.
Let’s start by creating an opportunity record where we can track our progress.
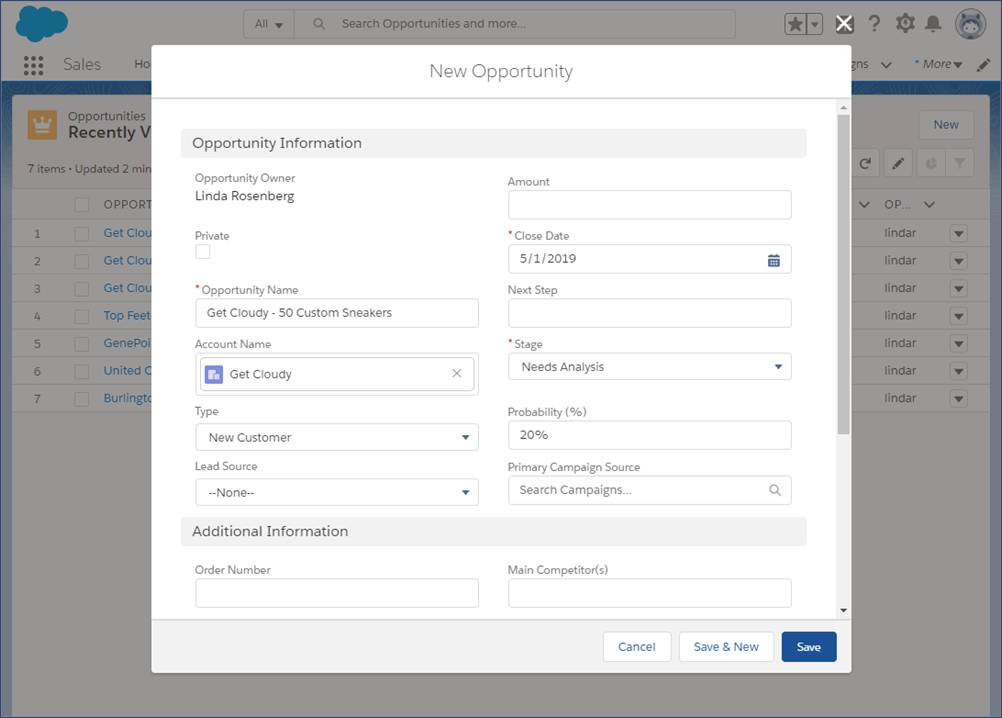
- On the Opportunities tab, click New.
- If your org has more than one record type for opportunities, select the type that best represents this opportunity.
- Give the opportunity a name: Get Cloudy - 50 Custom Sneakers.
- Select the account that the opportunity is related to.
- Select a close date for the opportunity.
- Select the opportunity’s current stage. For now, let’s use Needs Analysis. Salesforce adds a probability based on the stage selected. If the probability isn’t accurate, you can change it.

- Click Save.
Congratulations! You’re on your way to closing a great deal. We discuss how to move this deal through the sales process in a bit. First, let’s talk about who’s involved in this deal.
Contact Roles on Opportunities
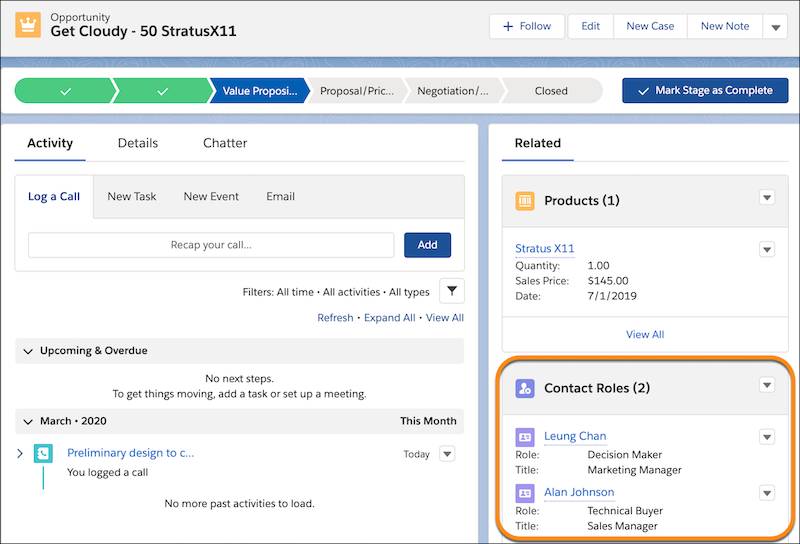
Contact roles on opportunities tell you which contacts you’re dealing with and how each contact is related to the opportunity. You can also use contact roles to link contacts from other accounts to the opportunity.
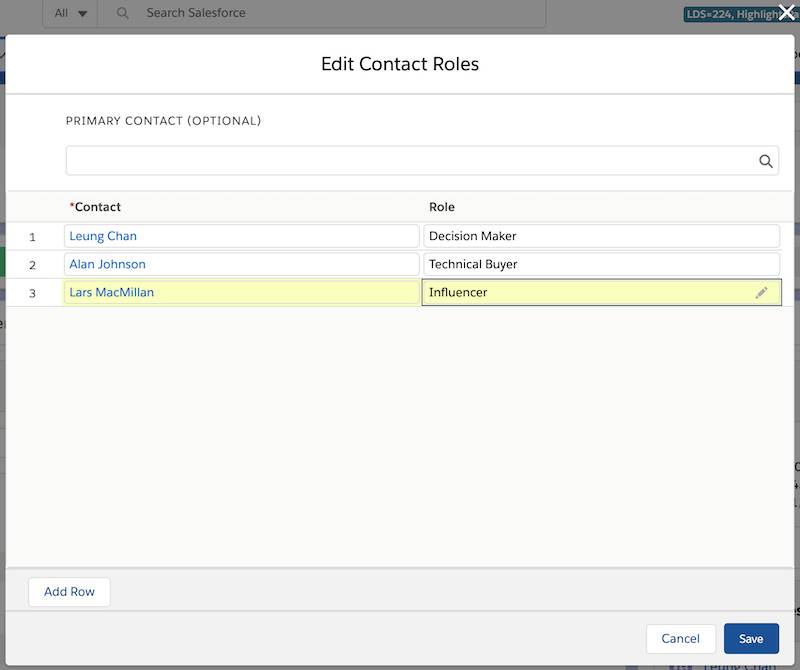
You recently completed a deal with Get Cloudy Canada. You hear from Leung Chan, a decision maker from Get Cloudy, that she’s planning to talk to her Canadian colleague Lars MacMillan about your product. For this sale, Lars is an Influencer. You can track that important information by giving Lars a role in the opportunity, even though he’s a contact on a different account.

If you’re following along and don’t see the Contact Roles related list, scroll down. Related lists can be displayed in a different order depending on how your admin arranged the page layout.
Take a minute to add Lars MacMillan as a contact for the Get Cloudy account. Then continue on to add his contact role for the opportunity you created.
- In the Contact Roles related list of an opportunity, select Edit Contact Roles.
- Enter a contact.
- Choose a role. If you don’t select a role or the role is set to None, changes you make to this role aren’t saved.

- If you like, select a primary contact for this opportunity.
- Click Save.

